
Palmer Course - General

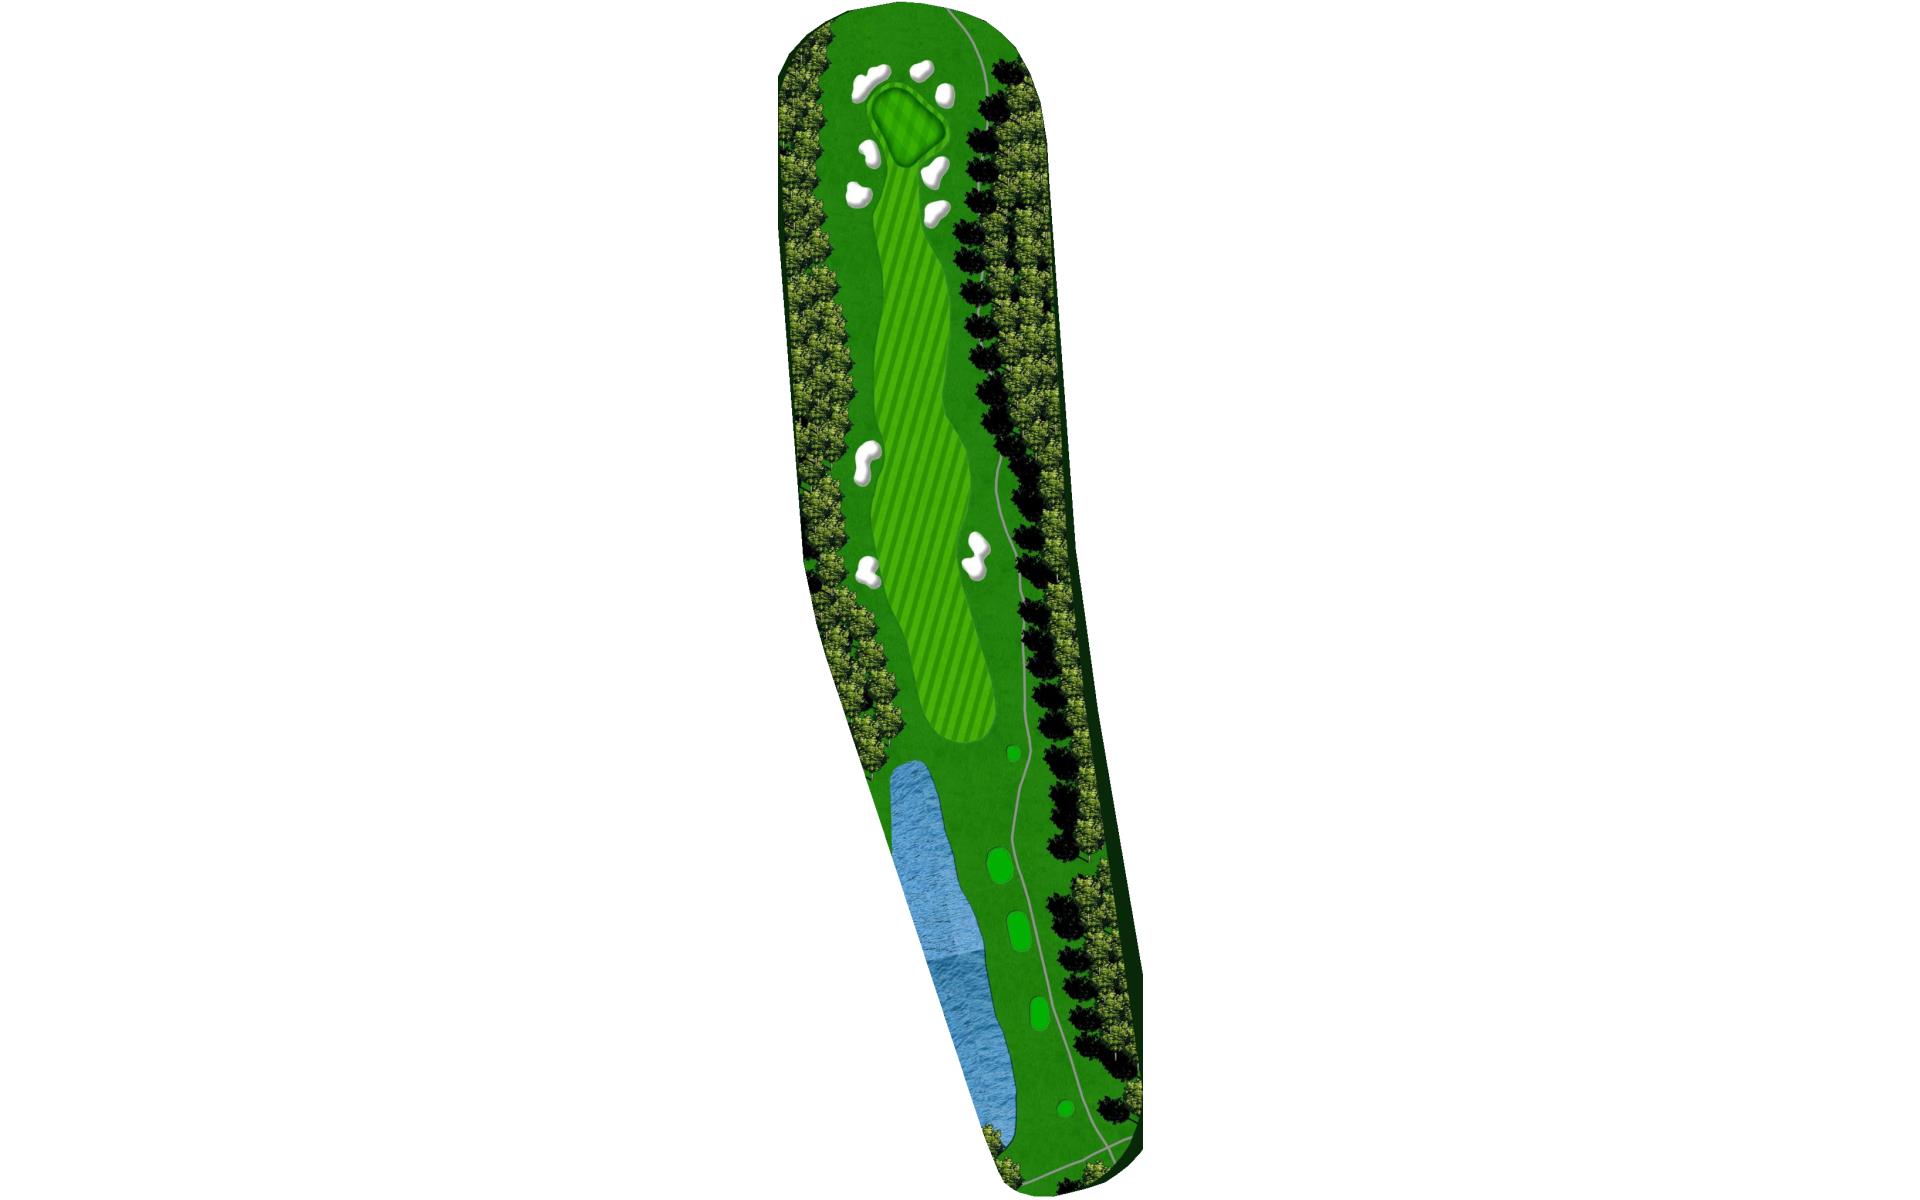
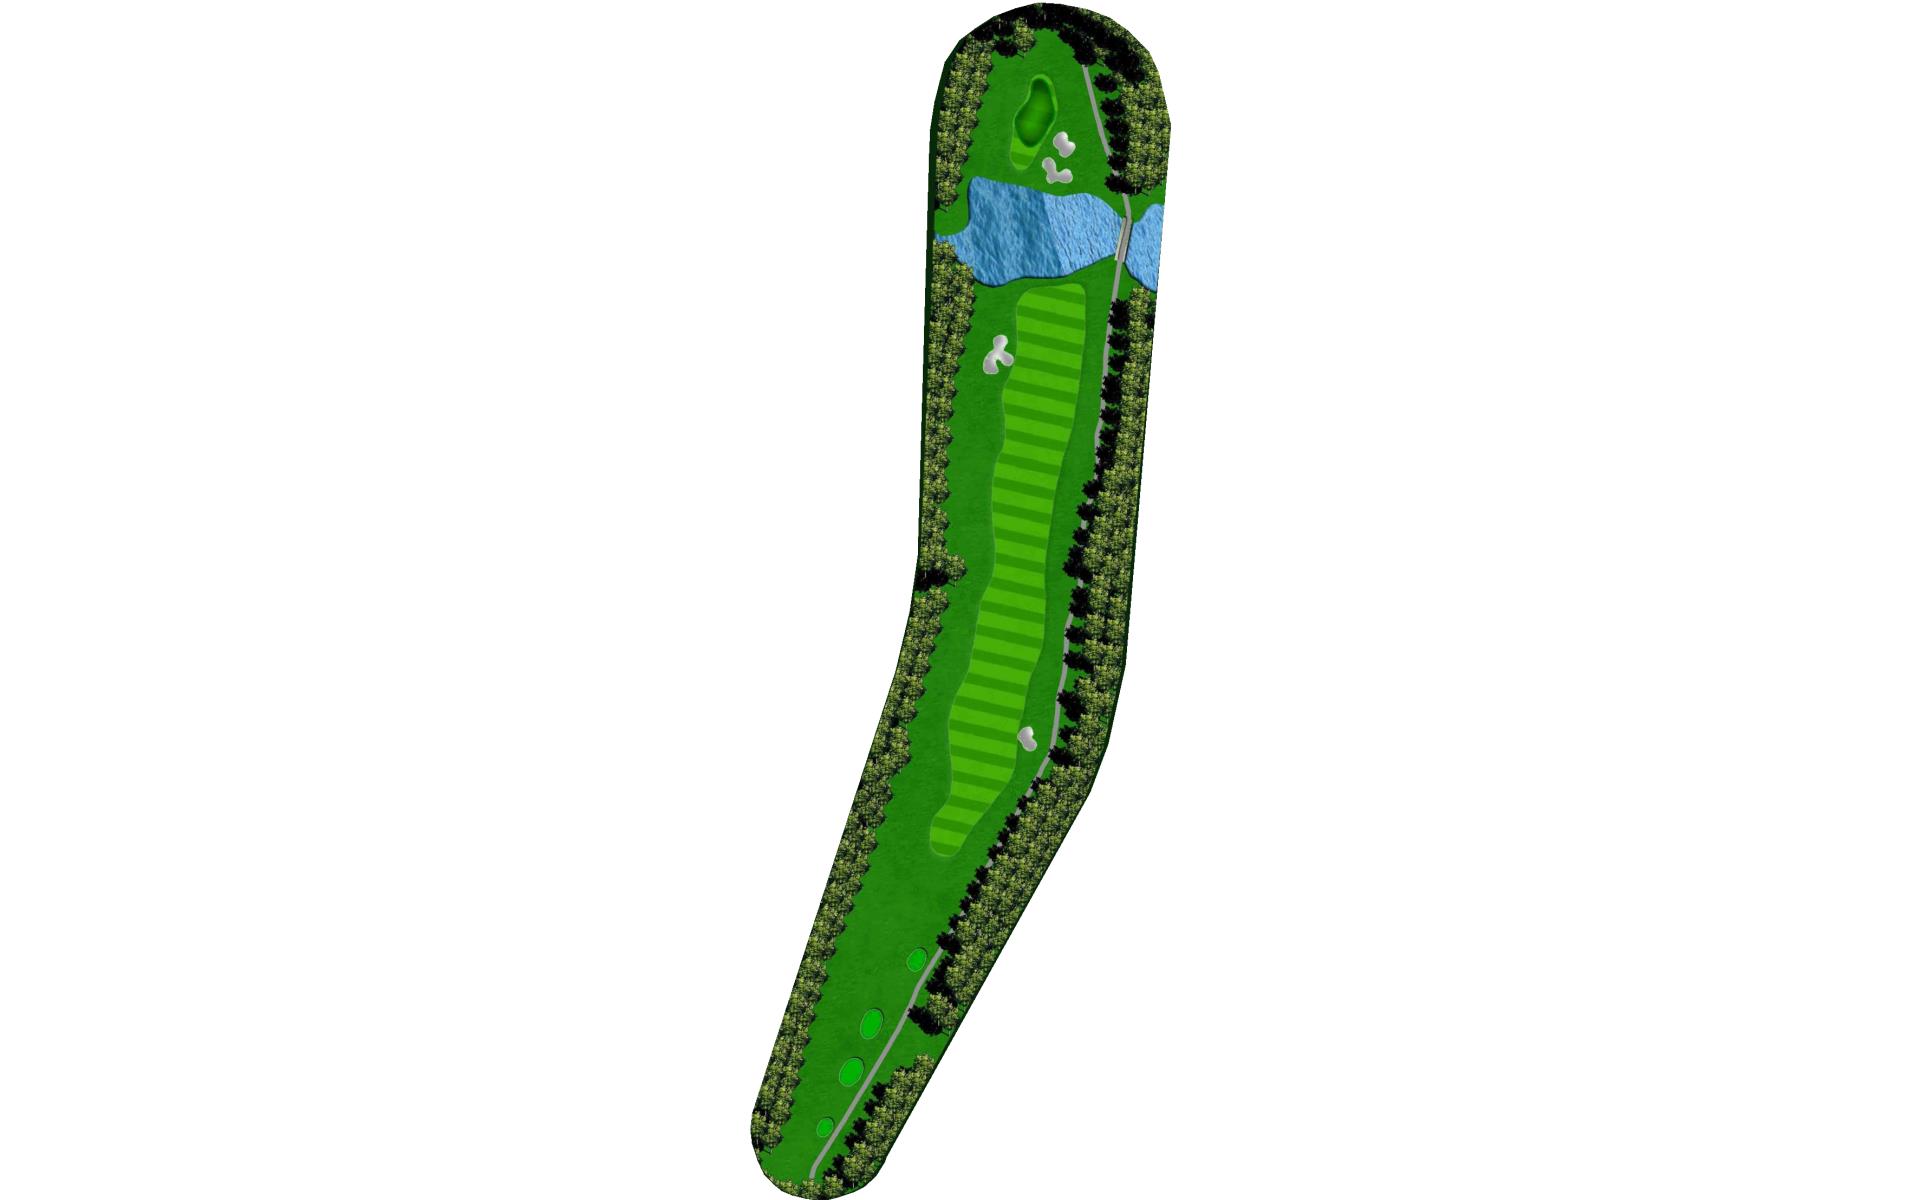
# 1 / Hole #1
Par: 4
Handicaps:
Men's 7
Women's 4
Yardage by Tee:
BLACK 449
BLUE 414
WHITE 398
GOLD 354
GREEN 349
Pro Tips
The first hole is a par 4 where the ideal tee shot is down the left side of the fairway. Approach shots into this receptive green tend to play a little longer than the yardage.

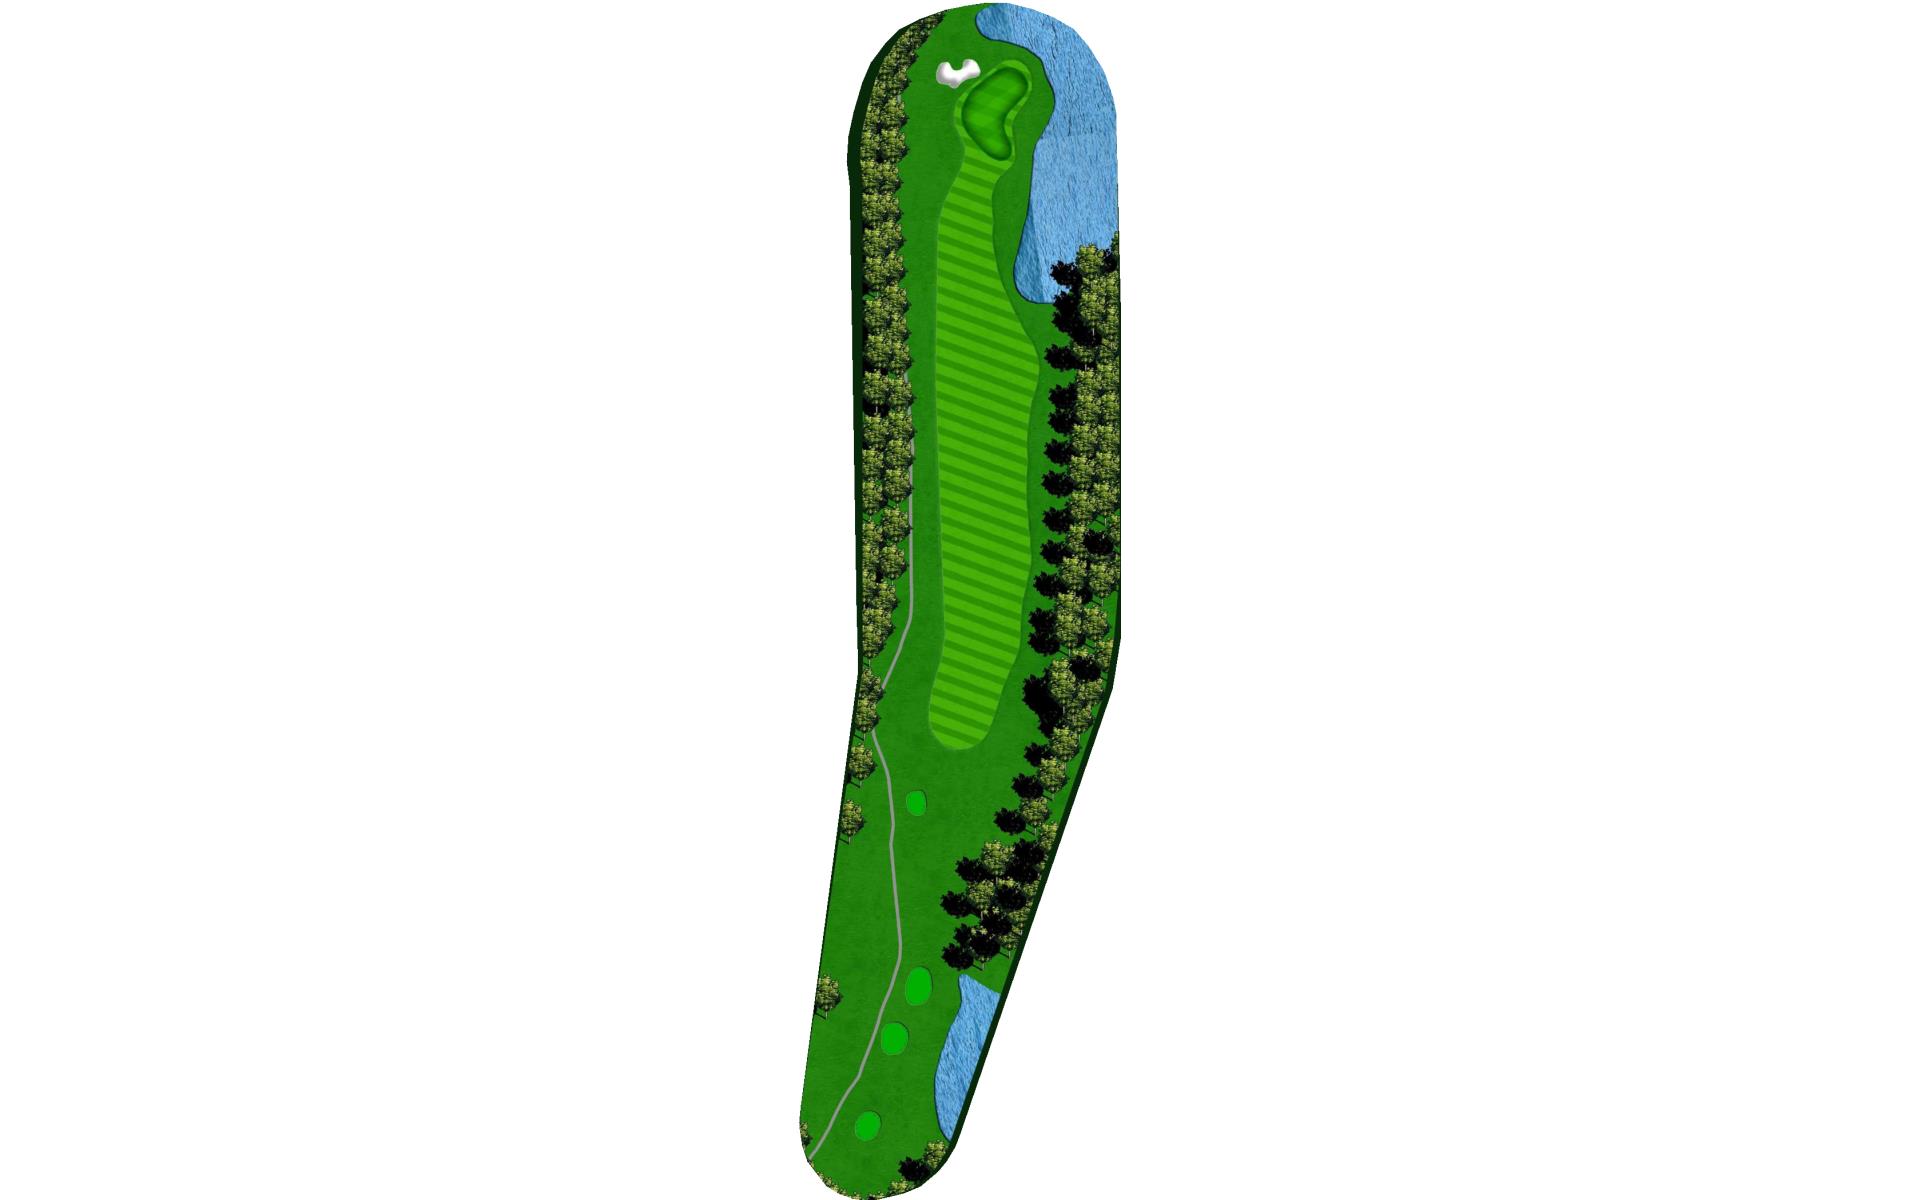
# 2 / Hole #2
Par: 3
Handicaps:
Men's 8
Women's 9
Yardage by Tee:
BLACK 191
BLUE 176
WHITE 161
GOLD 146
GREEN 131
Pro Tips
The green on this par 3 is fairly large and players should aim for the middle or right side. Anything missed left will leave a difficult up-and-down to make par.
# 3 / Hole #3
Par: 4
Handicaps:
Men's 4
Women's 7
Yardage by Tee:
BLACK 402
BLUE 363
WHITE 333
GOLD 326
GREEN 301
Pro Tips
The third is a straightaway par 4 that features one of the most difficult fairways to hit on the course. Anything missed left off the tee will be severely punished. On the uphill approach shot, players can get a little more aggressive.

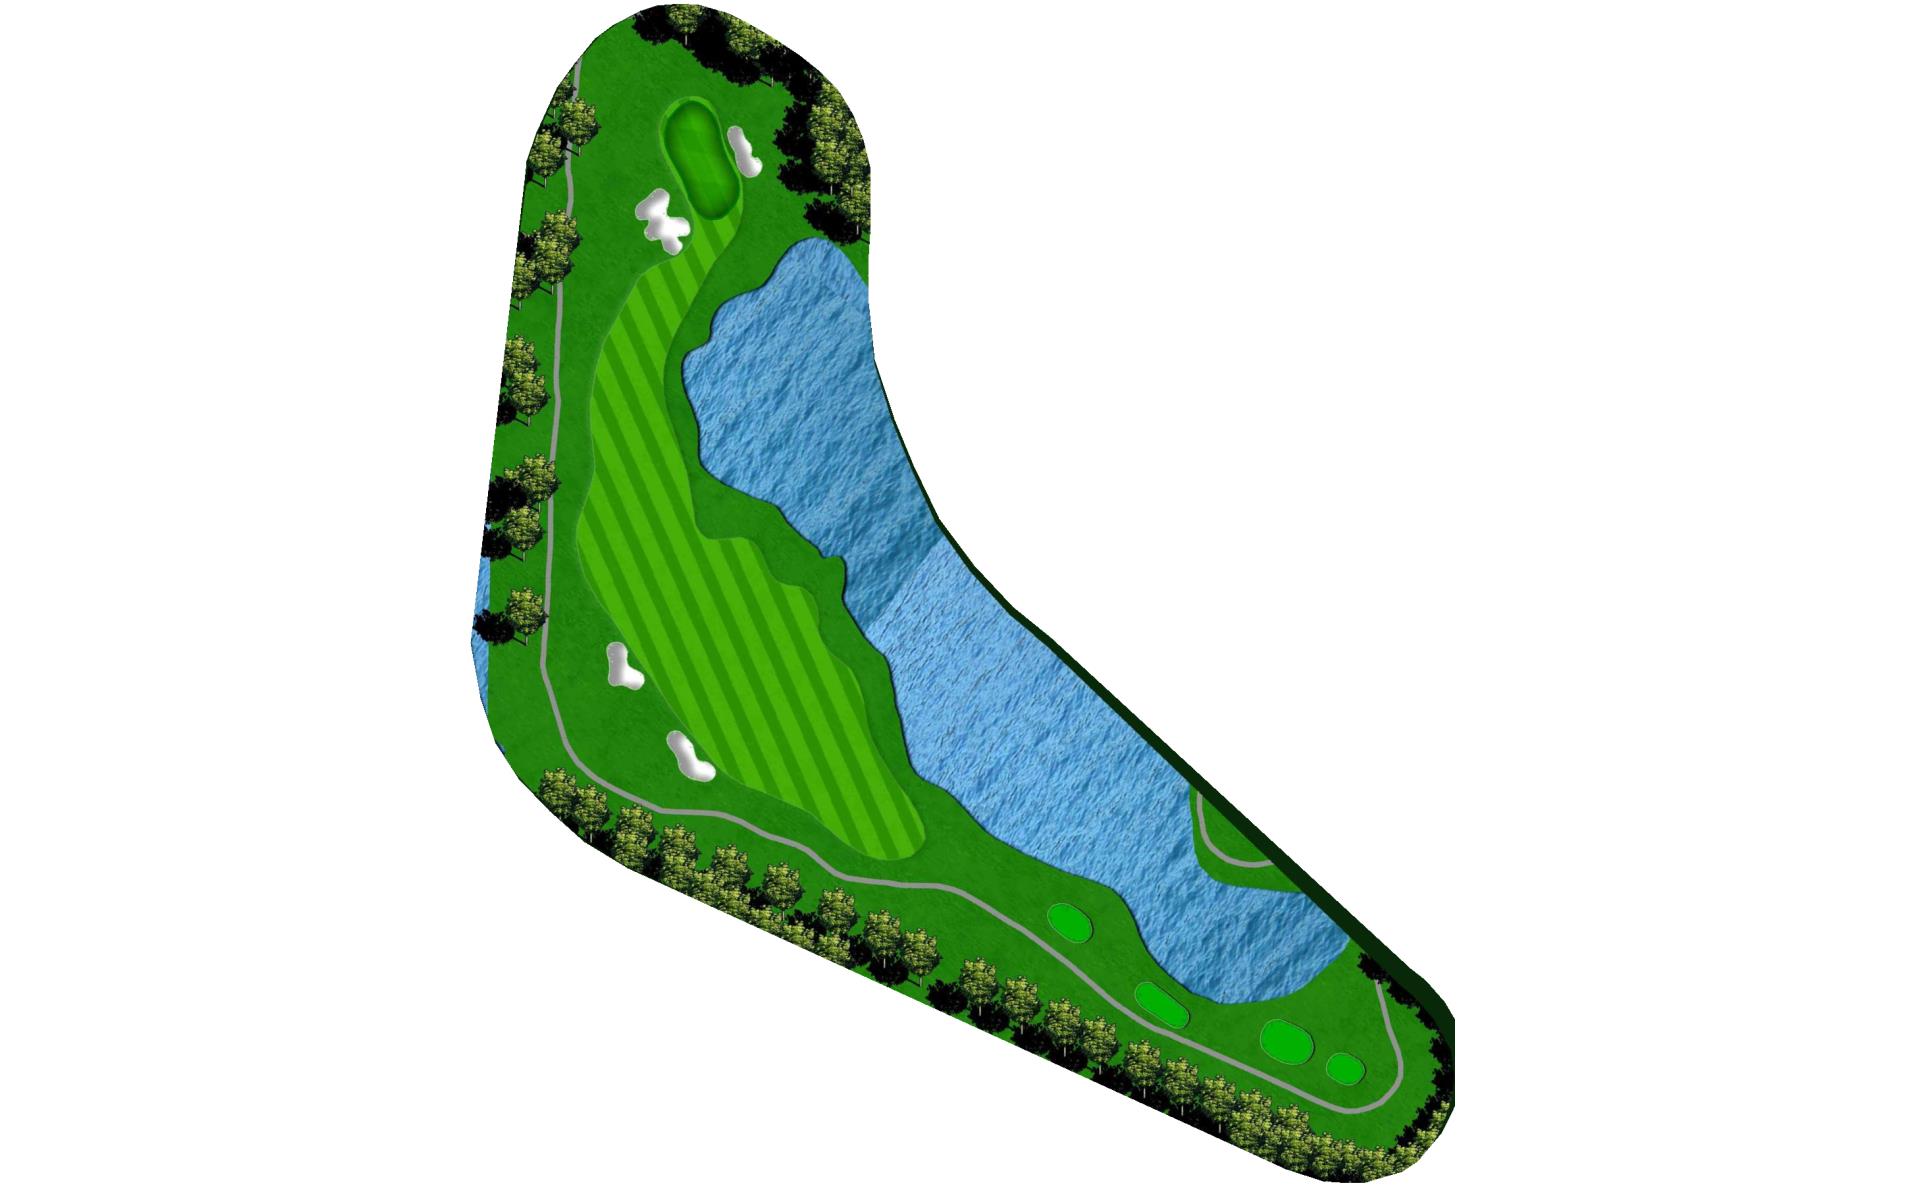
# 4 / Hole #4
Par: 5
Handicaps:
Men's 1
Women's 2
Yardage by Tee:
BLACK 528
BLUE 504
WHITE 462
GOLD 430
GREEN 407
Pro Tips
Favoring the right off the tee will help players avoid the water left and reach this par 5 in two. A lay-up is best played down the right to set up the best angle into the green. Anything long and left of this putting surface is not a good option.
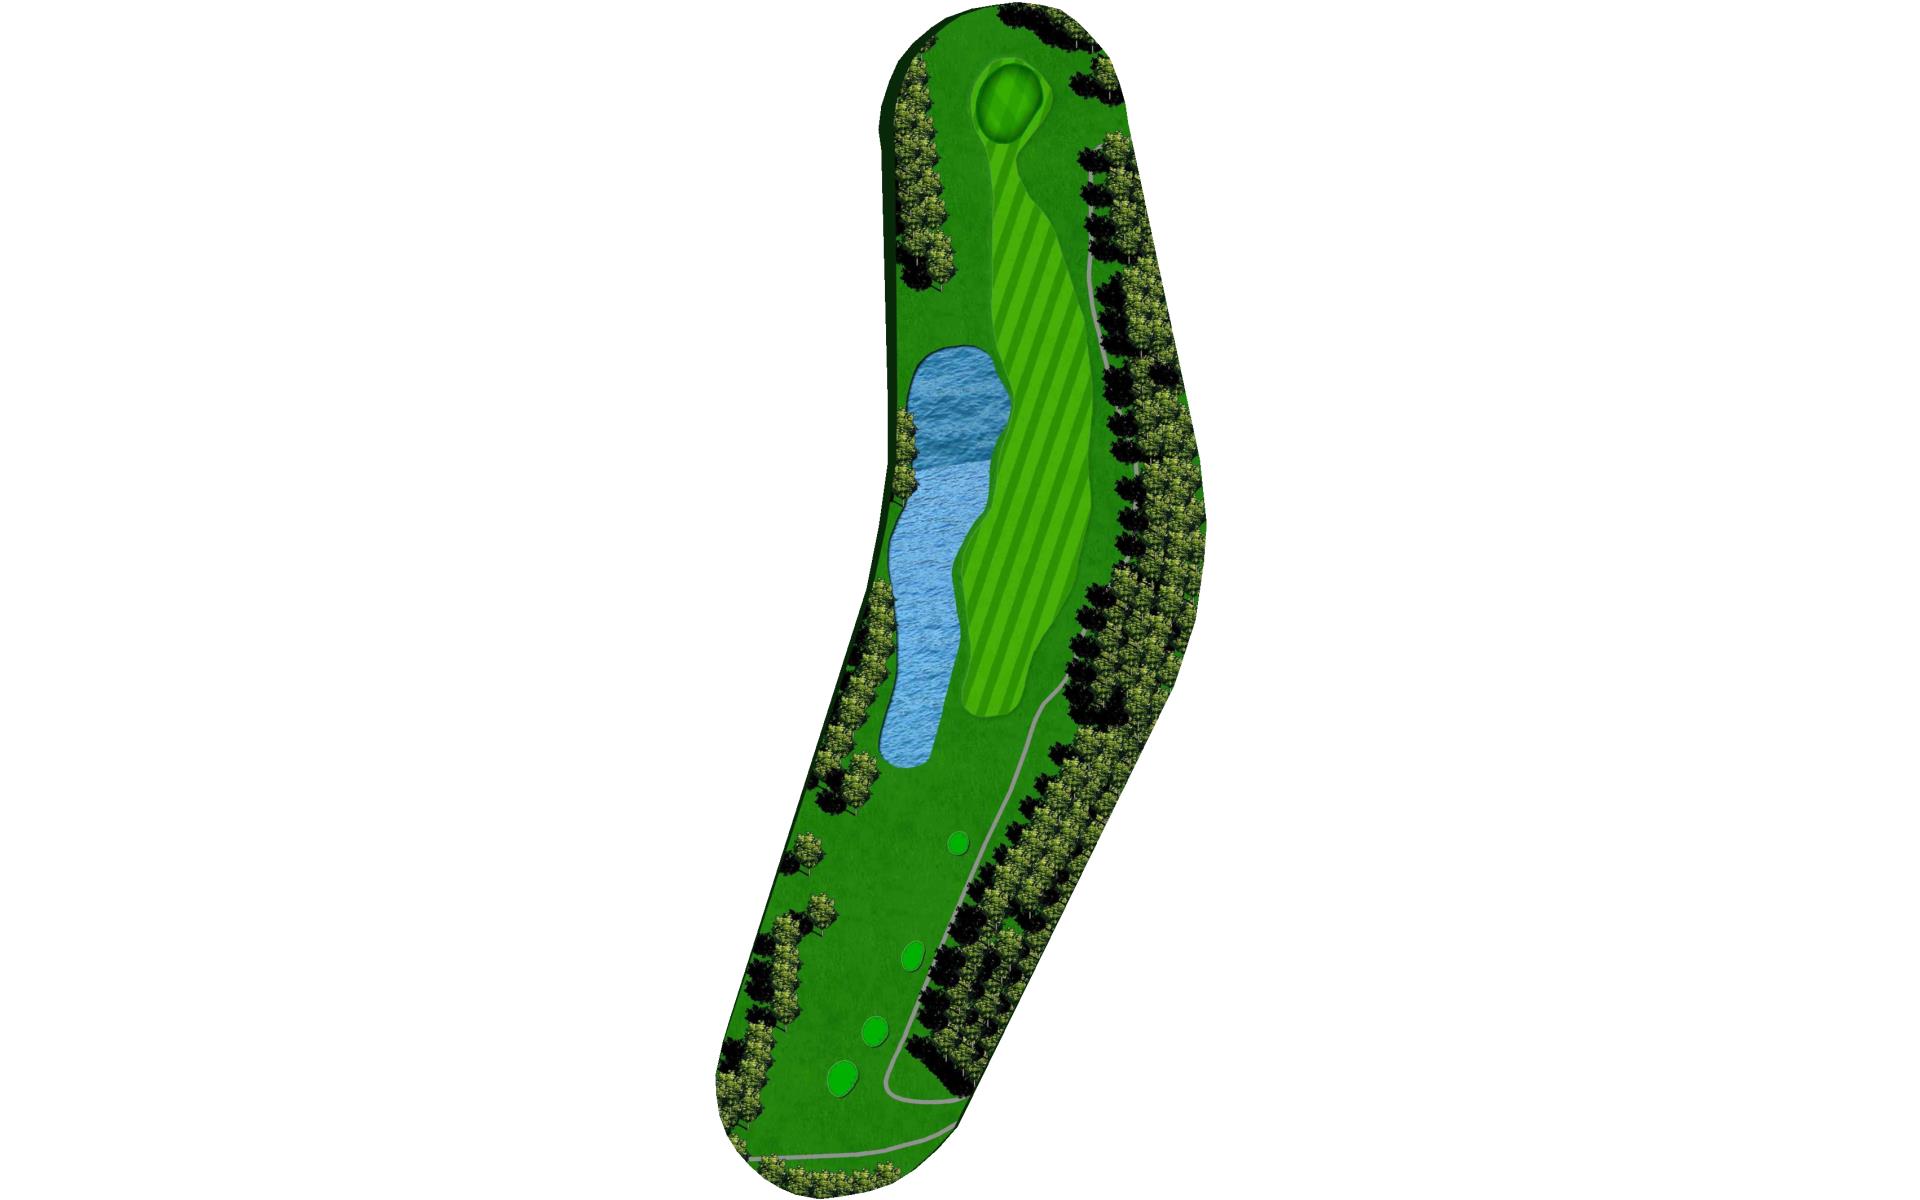
# 5 / Hole #5
Par: 4
Handicaps:
Men's 3
Women's 3
Yardage by Tee:
BLACK 403
BLUE 384
WHITE 351
GOLD 341
GREEN 306
Pro Tips
Off the tee, players can take an aggressive line towards the two tall pines straightaway. The green on this par 4 slopes left-to-right.
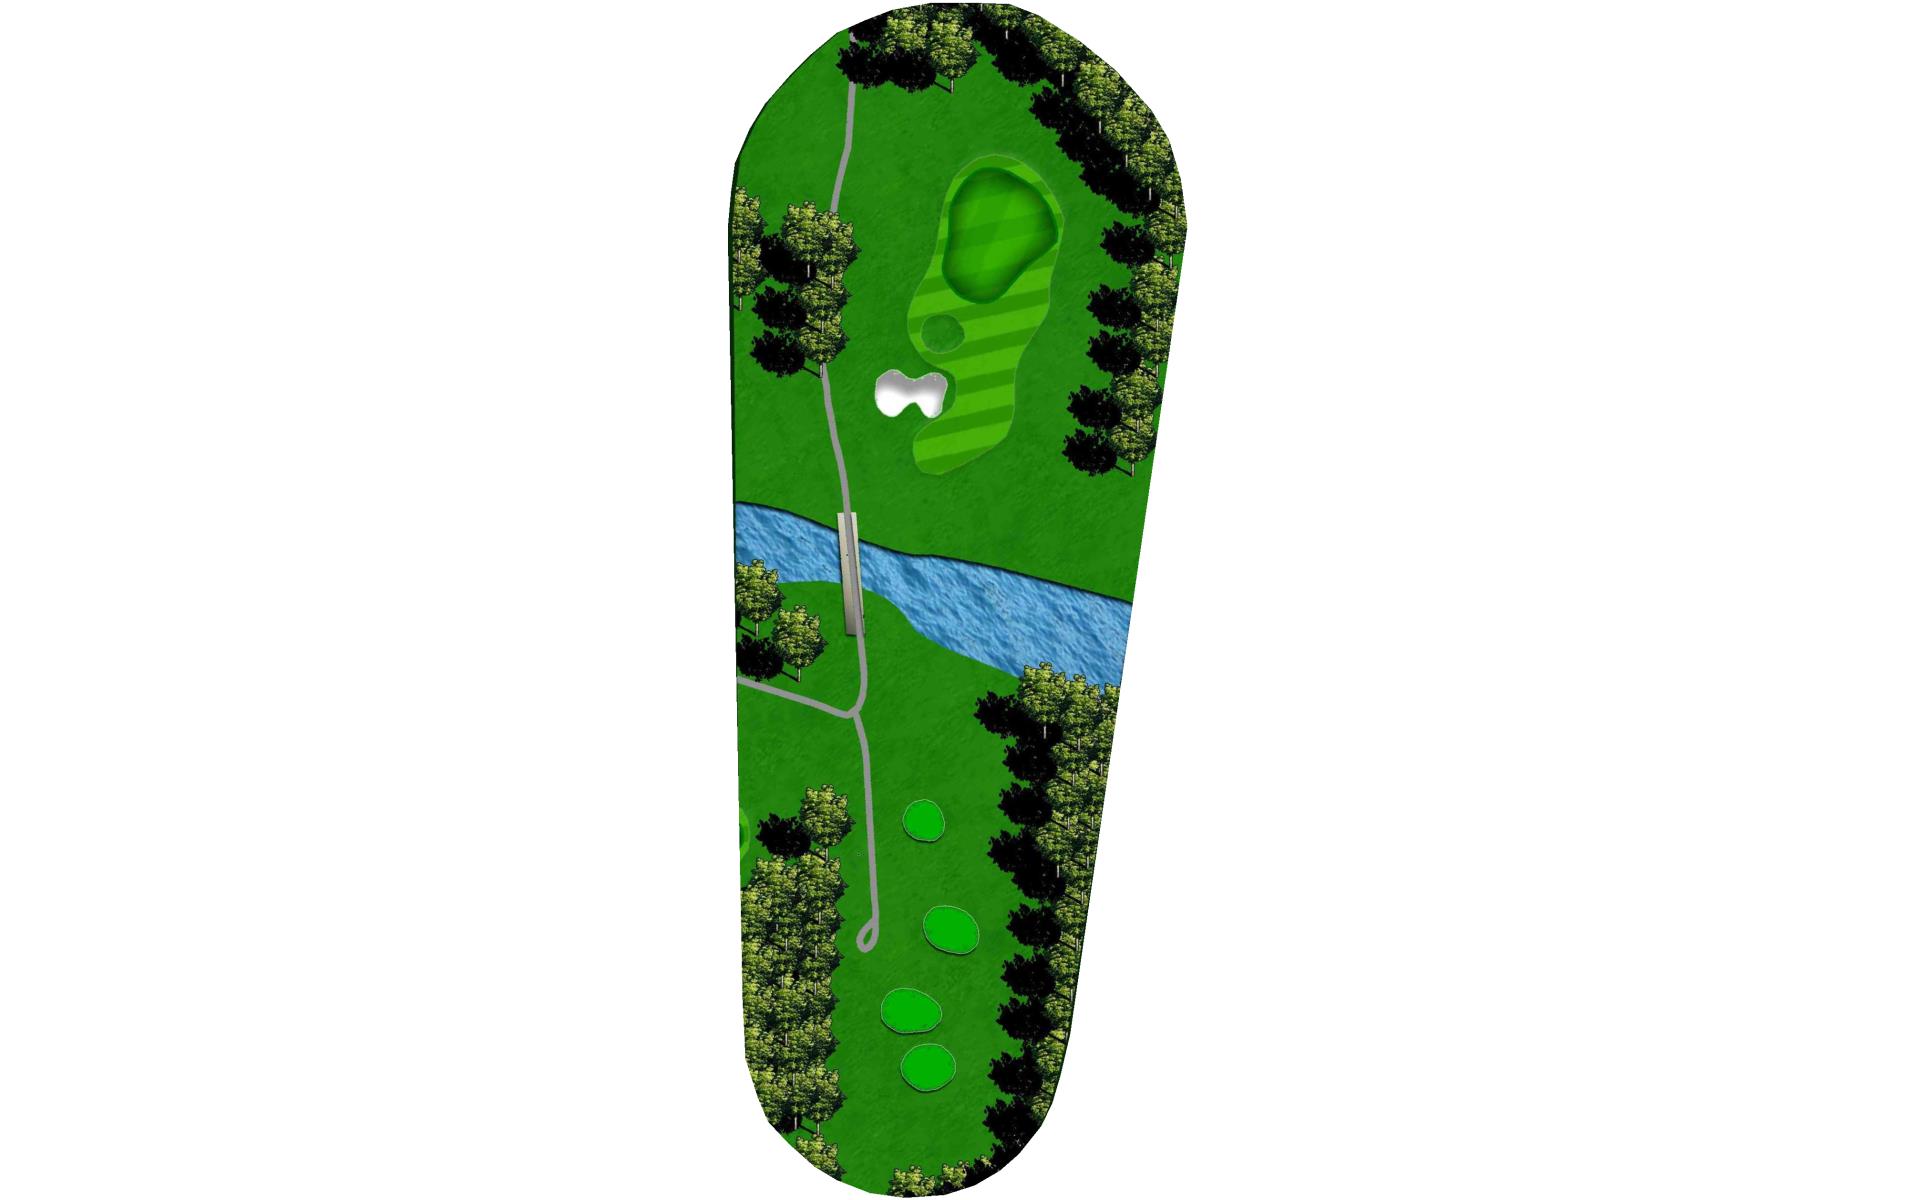
# 6 / Hole #6
Par: 3
Handicaps:
Men's 9
Women's 8
Yardage by Tee:
BLACK 201
BLUE 189
WHITE 171
GOLD 166
GREEN 142
Pro Tips
A large, relatively flat green awaits players on this long par 3. Balls tend to roll out here longer than players expect.
# 7 / Hole #7
Par: 4
Handicaps:
Men's 6
Women's 6
Yardage by Tee:
BLACK 426
BLUE 401
WHITE 370
GOLD 362
GREEN 315
Pro Tips
Favoring the right side, and not being too conservative, on this challenging par 4 will pay off in the form of a shorter approach. Most players miss short and right of this green.
# 8 / Hole #8
Par: 5
Handicaps:
Men's 2
Women's 1
Yardage by Tee:
BLACK 574
BLUE 543
WHITE 519
GOLD 511
GREEN 477
Pro Tips
The eighth is a three shot par 5 where a solid drive will leave a long-iron lay-up. The approach into this narrow, but deep, green will have to navigate three-tiers sloping back-to-front.
# 9 / Hole #9
Par: 4
Handicaps:
Men's 5
Women's 5
Yardage by Tee:
BLACK 423
BLUE 385
WHITE 365
GOLD 357
GREEN 286
Pro Tips
The finishing hole is a par 4 where tee shots should favor the right side, which will leave a short iron in. The green is fairly large and undulated, but players can get aggressive with trying to get their ball close.


How to Play the Palmer Course - General
Play this Arnold Palmer-designed golf course by becoming a Member of The Woodlands Country Club. Get in touch with our team to learn about membership and set up a tour.